|
Creating/Customizing Reports |

|

|
|
|
Creating/Customizing Reports |
|
|
Creating/Customizing Reports
|
Creating/Customizing Reports |
|
|
|
|
Creating/Customizing Reports |
|
|
New reports can be created by making copies of existing standard reports or of your own custom reports and then customizing and saving the copied report. The first step in this process is to select the standard or custom report from which you are to start. This is done by clicking on one of the reports on the report selection dialog. Choose a report that comes closest to the type of report you need from the "Available Standard Reports":
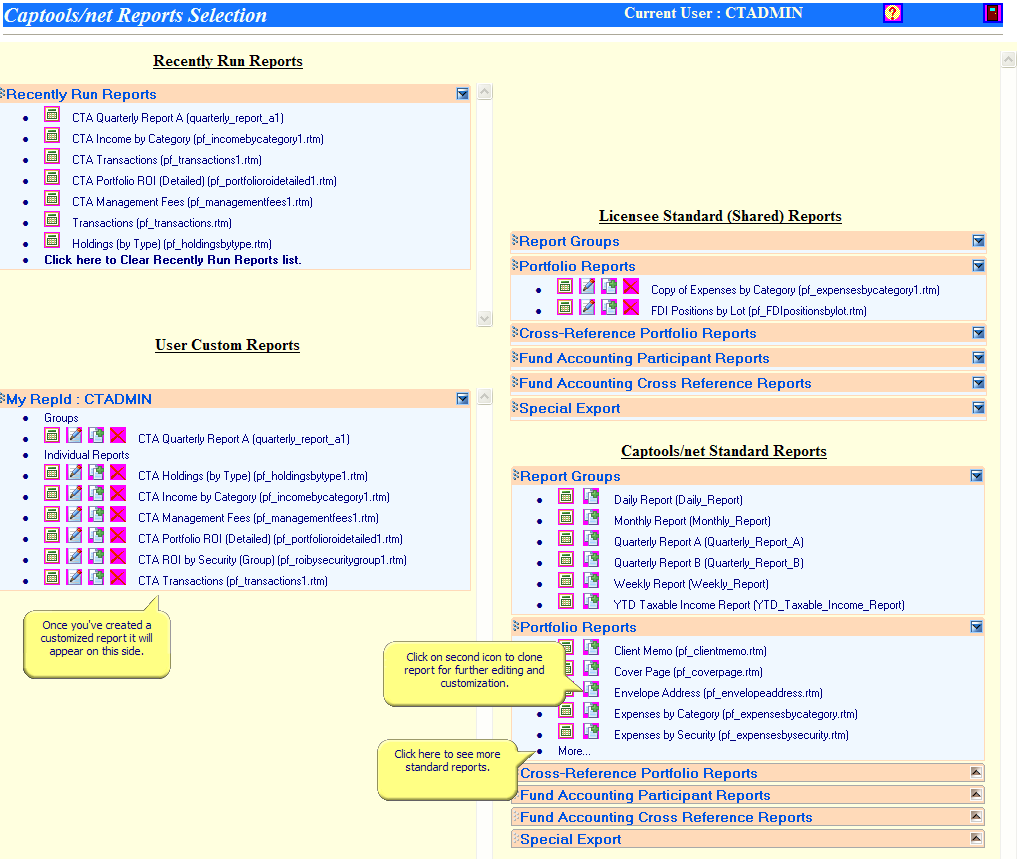
Click on the second icon preceding the report name to "Clone" the report (the first icon is for running the report without customization). Cloning creates your own copy of the standard report, which you are free to further customize. The first view you will see when you Clone a report will be similar to the following:
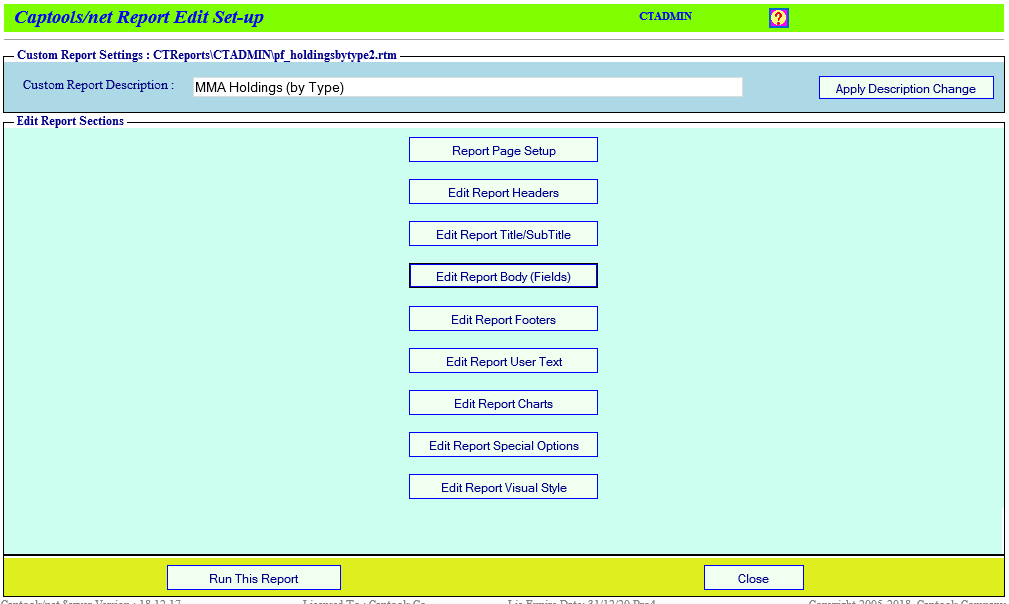
Note that a unique report filename is assigned to this report. You will generally not need to change this, unless you wish to overwrite an existing report template (be sure to always end the filename with ".rtm"). The Report Description is inherited from the standard report. You can modify this to better describe the report for your purposes. This is the description which will appear in the report selection list, so this description should differ from existing reports so that you do not confuse one report with another.
The second section of the Report Edit Set-up permits you to specify the report page size, margins and page orientations. If you change these, click on the "Apply these Changes" button to ensure that these are saved prior to running the report.
Report Edit Action - The buttons in this section accesses the major sections of the report to customize their contents and attributes. These sections are discussed below in more detail.
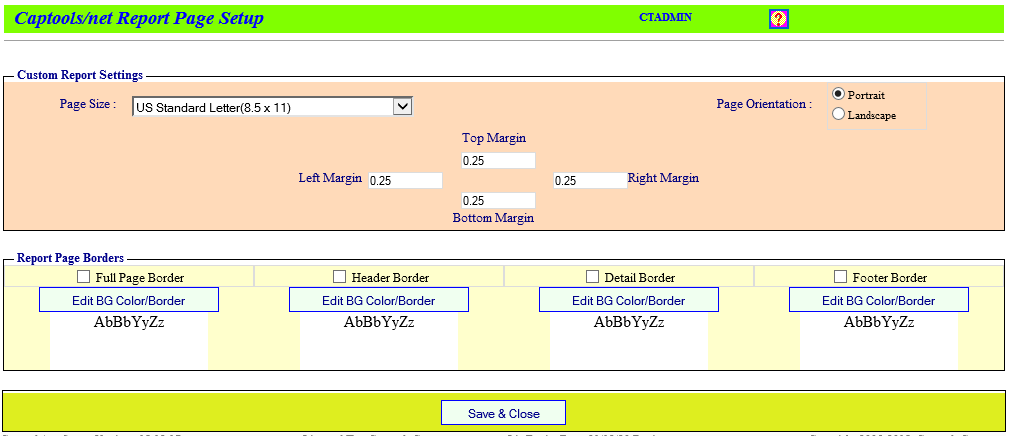
Clicking upon Report Page Setup allows you to control the page size, margins and page layout. It also allows you to specify the borders and background colors for major regions of the report:
Clicking upon the Edit Report Headers or Edit Report Footers buttons allows you to specify what information will be contained at the top and bottom of the report page as well as user-definable text appear just prior to and/or just after the report body. These specifications appear similar to the following for the header region:
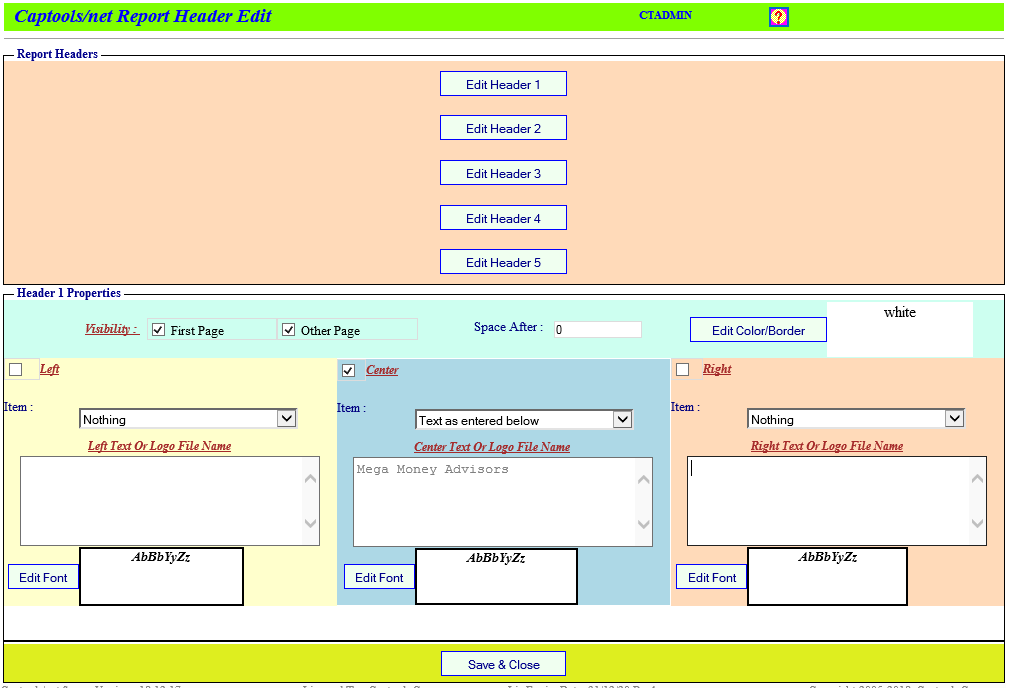
Up to five header bands and three footer bands may be specified. Clicking upon one of the buttons at the top of this control, opens the corresponding controls in the panel at the bottom. The Visibility control allows you to specify whether a header will be displayed on all pages or only on the first or last pages. The Space After control allows you to increase the spacing between header (or footer) bands, while the Edit BG Color/Border control allows you to specify the background color and shape of each header (or footer) band.
Each header (or footer if you are editing the footers) has a left, center and right region. For each of these regions you can specify the type of information to be displayed, using the drop-down control:
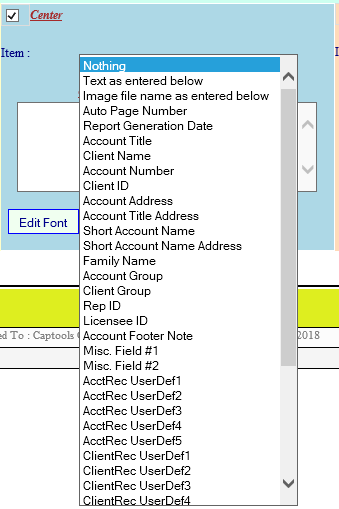
If you are specifying "Text as entered below", specify the text you want in the text edit box. Other items, except Image files (see below) will be filled in is applicable for the report data. One item, "Account Footer Note" will be fetched from an account note record of type "Report Footer Note" if it exists for the applicable account. Similarly, the Account Title will be overridden via an Account Note record of type Client/Account Title Note. If you want the selected item to be accompanied by text, simply type the desired text in the text area, and include the notation "<i>" where you want the selected item to be placed. E.g. if you want the notation "Page" before the actual page number, then type "Page <i>" into the text area and select "Auto Page Number" as the item selection.
The Edit Font control permits you to specify the text font to be used for the selected items.
Logos - If specifying an image file for a logo, specify the name of the image file in the text edit box. When you specify the logo file in the report header or footer control, you specify the image file name, optionally preceded by a "scale factor" as follows:
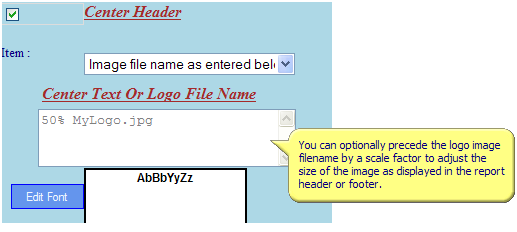
You can include the scale factor as part of the filename by excluding the "space" character, e.g. in the above example the file name would be "50%_MyLogo.jpg" or "50%MyLogo.jpg".
Logo File Folder Location - The location in which the logo file must be placed on your server is in \Program Data\Captools Net\CTReports. However, if you would like to give one or more user their own logo, you can place the logo file down one more level in the CTReports\UserId folder where "UserId" is the log-in Id used by each user. In this case each user would need their own custom reports, however, shared reports can be used so long as the identical filename is used by each user for the logo file.
Specifying Logo File in Client or Account Records - At the Pro or Enterprise Level 4 version of the software, you can specify your logo files in a "User Def" or "Misc" field in the Client or Account records.
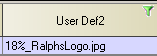
Then in the report template, specify the field containing the data in the the applicable report header or user text area in lieu of the actual logo filename, and when the report runs it will look at that field in the applicable record for the logo filename:
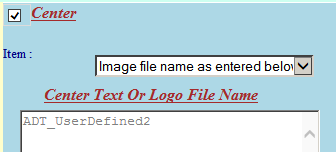
Although most string fields in the client and account records can be used (except primary key fields), we recommend using "ADT_MiscUserFields1 to ADT_MiscUserFields3 ", ADT_UserDefined1 to ADT_UserDefined5, or CDT_UserDef1 to CDT_UserDef9.
This control, shown below, allows you to specify the report title and subtitle, including fonts and background colors. Text in the title contained in parentheses is displayed in the report selection list, but is not displayed in the actual report. The notations "\sd" and "\ed" are place holders for the report start date and end date, and are replaced by the appropriate date values when the report is run.
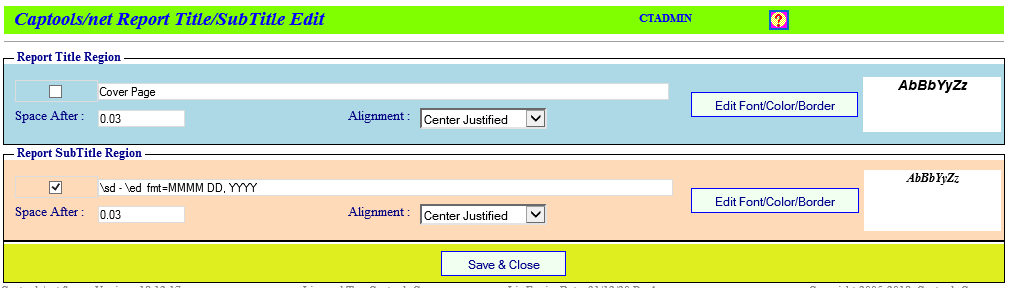
The example above will print out the date in the sub-title region using the date format you've specified with the "fmt=" notation followed by formatting codes as in the example. If you omit the "fmt=", the dates will be rendered in the system "short format" (e.g. mm/dd/yyyy) or the short format you've specified in the "Header Date Format" control in the report special options.
However some users, may wish to use a "Long Date" format (e.g. "December 31, 2020"). In this case you can specify your formatting directly in the field using the "fmt=" notation as follows:whatever header date format you've specified in the "special" options, which gives you a list of "short date formats".
This control, permits you to specify which fields are to be included in the report, to specify the field order, and to specify sorting and sub-total grouping.
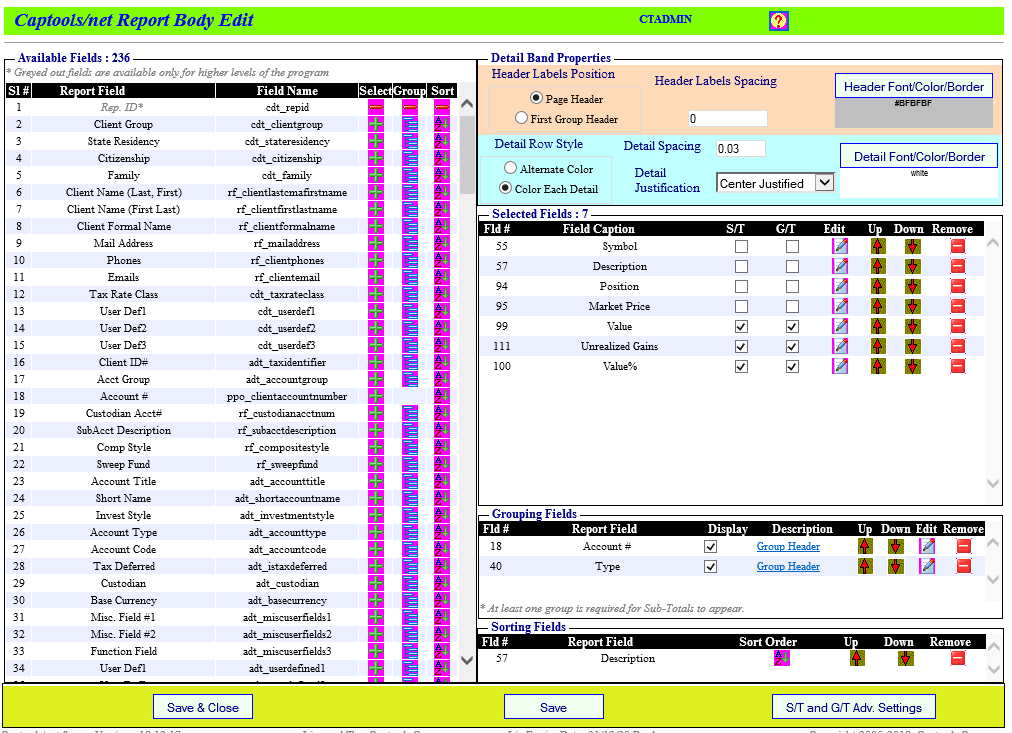
The fields appearing in the right side of this control can be moved up or down using the "arrow" icons or can be removed using the "minus" icons. The S/T and G/T controls specify whether the field will display a value (checked) or be blank (unchecked) when appearing in a subtotal or grand total record. Clicking upon "Group Header" or "Group Footer" in a Grouping field specifies whether the group description will appear at the top of the group or in the group subtotal record. Clicking upon the "Sort Order" icon in the sort records allows you to specify whether the sort order is ascending or descending.
At least one Grouping Field is required for subtotals checkbox to be active. Deleting all grouping fields will cause the subtotal check boxes to lose their status. Therefore when modifying a report's grouping, be sure to add a new grouping field before deleting the last one.
Field Edits - Clicking upon the "Edit" icon for one of the selected fields permits you to edit a wide variety of characteristics controlling how that field will be displayed in the report, from font, alignment, and width to formatting and range controls. The following is an example for a numeric field, the controls exclude the numeric options for text fields (Warning: this edit function will be blocked if you have not configured your browser pop-up blockers to allow your Captools/net server. Alternatively, you can use the "Control" key when you click on the "Edit" icon to permit this edit function to pop-up):
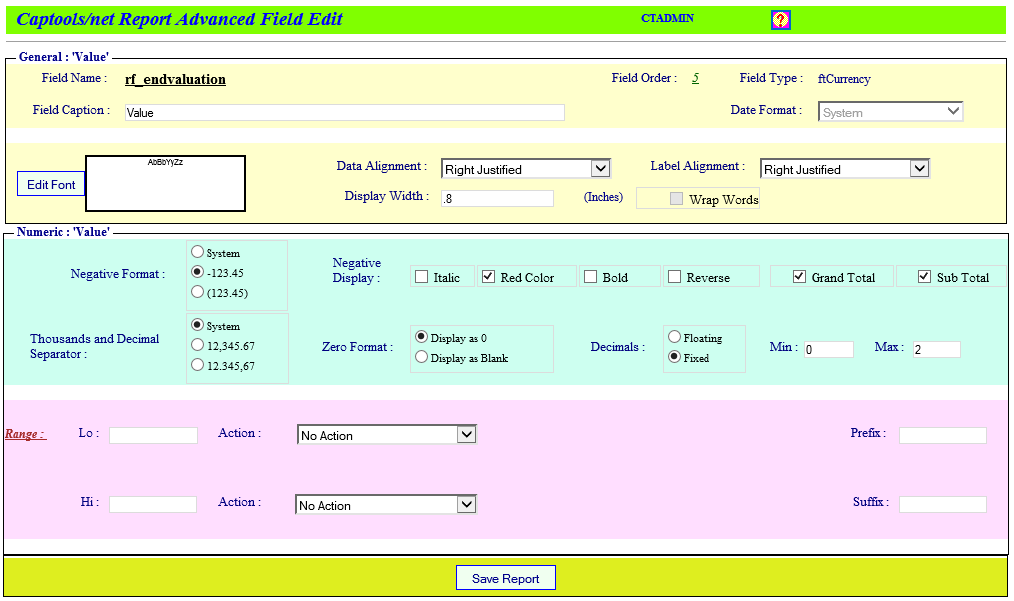
Field Label Placeholders : The notations "\sd" or "\ed" when placed in the field caption will be replaced by the applicable start and end dates respectively when printed in the report table headers.
Security Index Placeholders of the format "0 Index ROI/yr". At report runtime these are replaced by the appropriate index name as indicated by the index symbols specified in the program preferences or overridden in the account record preferences. E.g. if the primary index symbols is "SP500" and its description in the security record is "S&P 500" then "S&P 500" will appear in the caption in the report for this field. If you would like to specify something like "Account Benchmark", you would replace the default "0 Index ROI/yr" with "Account Benchmark", including the quotes, which will be removed upon report output.
This control permits you to place text in your report, to appear before and/or after the charts and data tables in the report. Typically this would be used to provide additional explanatory information about the chart or table, as shown in the example below:
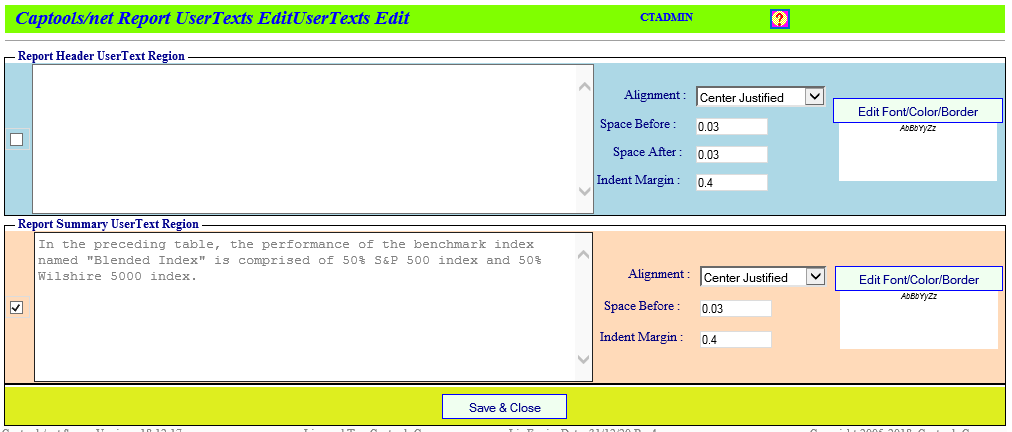
User Text Placeholders - You can insert placeholders in the user text which will be replaced by the contents of various data fields as follows:
Client or Account Record Fields - The name of any client or account record (with the "CDT" or "ADT" prefixes) can be inserted in the user text and it will be replaced by the database contents of the field. You can discern the names of these field when you edit the report body as field names beginning with "CDT" or "ADT".
Account Note Fields - The contents of account notes record note field can be inserted into the user text using the placeholder "ant_RptFootnote" for an account note of the "Report Footnote" type, or using the placeholder "ant_BlendedIdx" for an account note of the Blended Index specification type. If the note field is empty, the "Subject" field of the record will be used. The applicable note record must be dated on or prior to the end date of the report.
Graphic Signature Inserts - Placing the notation "{25% MySignature.jpg}" (without quotes, but with brackets) in the User Text will cause the graphics file "MySignature.jpg" to be loaded and displayed, in this case with a 25% size reduction. The file "MySignature.jpg" must be placed in the "CTReports" base folder under the Captoolsnet data folder on the Captoolsnet server machine.
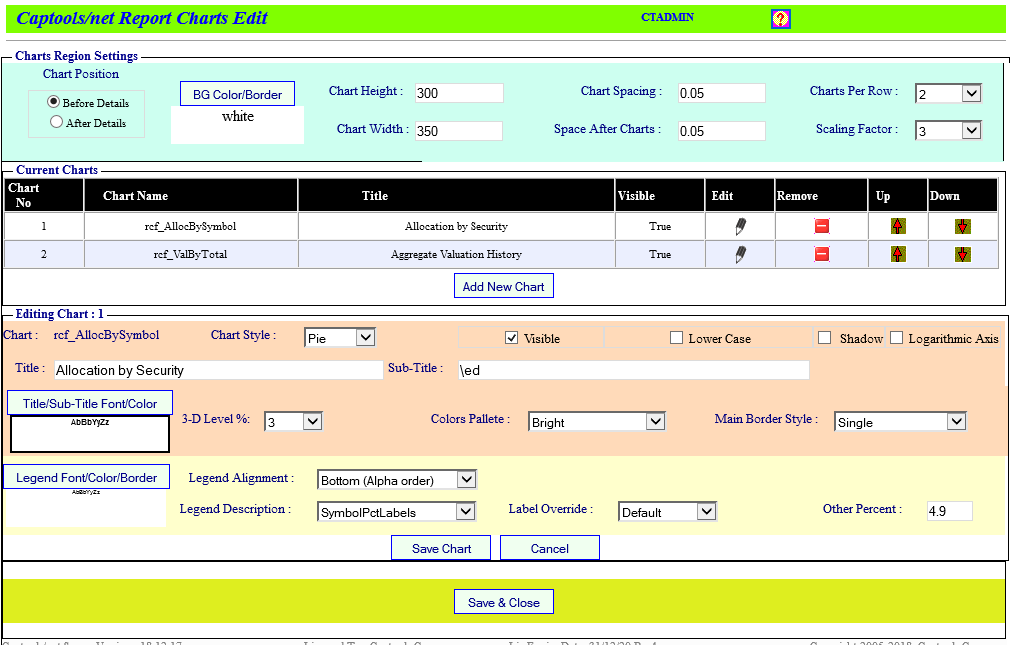
Many Captools/net reports give you the option to include charts. Except for Security Metrics charts, which appear within the report data table, charts are specified to appear in the report either before or after the data table. The Charts control permits you to specify which charts (up to four) will appear in a given report, and allows you to control the chart size and other chart characteristics:
Many Captools/net reports contain report-specific options which control how the report is computed and displayed. These options can be set by clicking on the "Edit Report Special Options" button on the Report "Edit Setup" page. The relevant options will vary from report to report. We attempt for the purpose of these options to be self-explanatory based upon their caption. However some of the more common of these are described in more detail in the sub-chapter Report Special Options.
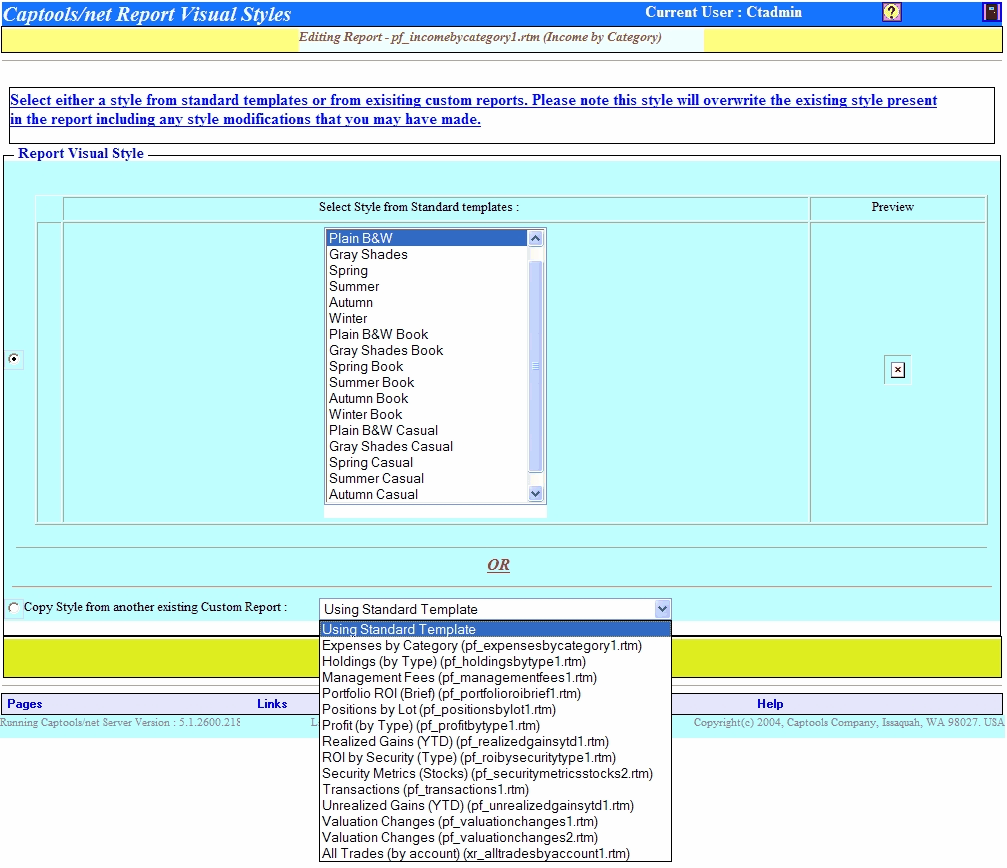
This control allows you to set the style of your report at "macro" level, i.e. without needing to edit every report component to set fonts, formats and colors. You may select from a number of "Standard" styles, or you may copy the style from a report that you have manually customized.